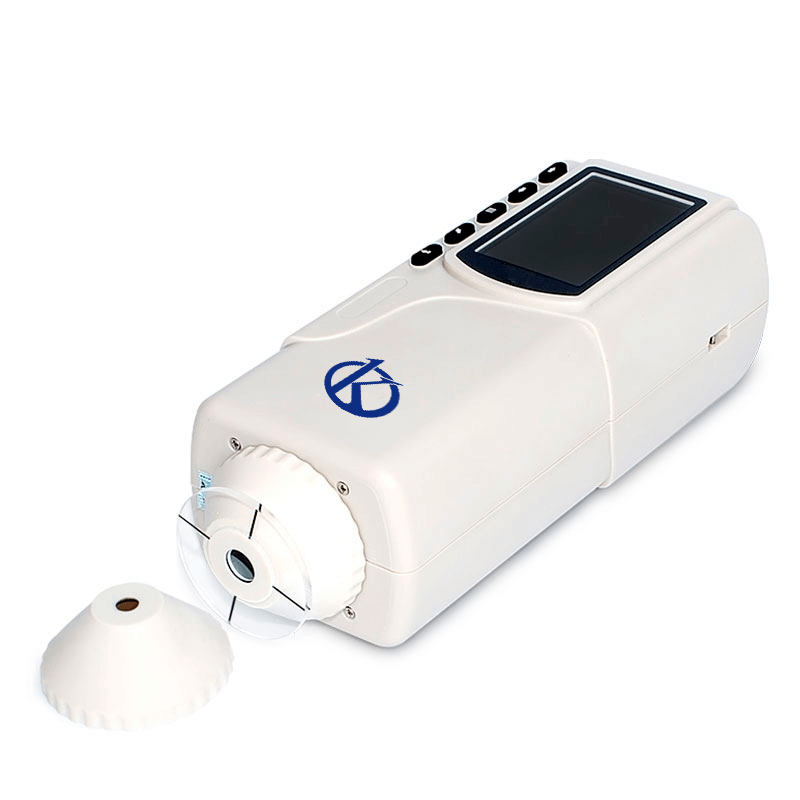
Installation and Commissioning Guide for the YR05512 Precision Colorimeter
The YR05512 Precision Colorimeter is a state-of-the-art instrument designed for precise color measurement in various applications, including industrial and laboratory settings. This guide will walk you through the installation and commissioning process, ensuring that your device operates efficiently from the outset.
Unboxing Checklist
Before you begin the installation, ensure you have all the components and accessories that come with the YR05512. Below is a checklist of items provided in the package:
- YR05512 Precision Colorimeter unit
- Power supply and adapter
- User manual
- Calibration standards
- USB data cable
- Cleaning cloth
- Optional thermal printer (if purchased)
Physical Setup Requirements
The YR05512 requires a stable and clean environment for operation. Follow these guidelines for effective physical setup:
- Location: Place the colorimeter on a flat, stable surface away from direct sunlight and heat sources.
- Ventilation: Ensure proper air circulation around the unit to avoid overheating.
- Clearance: Maintain at least 30 cm of space around the colorimeter for optimal performance.
Power-Up Sequence
Once the physical setup is complete, follow these steps to power up the YR05512:
- Connect the power supply to the colorimeter and plug it into an electrical outlet.
- Press the power button located on the front panel.
- Wait for the initialization sequence to complete, which will be indicated by the display lighting up.
First-Run Calibration
Calibration is necessary to ensure the accuracy of the YR05512 measurements. Follow these calibration steps:
- Turn on the device and let it warm up for about 15 minutes.
- Select the calibration option from the main menu.
- Use the provided calibration standards to set the baseline measurements.
- Follow the on-screen instructions to complete the calibration process.
Network/USB Setup
For data exporting and software integration, you may want to connect the YR05512 to a PC:
- Connect one end of the USB cable to the YR05512 and the other end to the PC.
- Install the provided CQCS3 software on your computer.
- Follow the software prompts to detect the colorimeter and establish a connection.
Validation of First Measurement
After calibration and setup, perform a first measurement to validate the device:
- Place a sample on the measurement area.
- Press the measure button to initiate the reading.
- Record the values displayed and compare them to known standards to ensure accuracy.
Common Setup Mistakes
Here are a few common mistakes to avoid during the installation and commissioning of the YR05512:
- Not allowing the device to warm up before calibration.
- Placing the unit in direct sunlight or near heat sources.
- Overlooking the need for regular recalibrations after extensive use.
Technical Specifications
| Model | YR05512 (current) |
|---|---|
| Illumination/View Geometry | 8/dia |
| Measurement Aperture | Φ4mm |
| Detector | Silicon photoelectric diode |
| Locating | Illuminated location/cross-location |
| Measurement End Face | Large stable end and small concave-convex end |
| Color Space | CIEL*a*b*C*h* CIEL*a*b* |
| Color Difference Formula | △E*ab △L*a*b* △E*C*h* |
| Light Source | D65 |
| Light Source Device | LED Blue light excitation |
| Errors Between Each Unit | ≤0.80ΔE*ab |
| Storage | 100pcs standards 20000pcs samples |
| Repeatability | Standard deviation within ΔE*ab 0.08 |
| Language | English/Chinese |
| Weight | 450g |
| Dimension | 205×67×80mm |
| Power Supply | 3.7V lithium-ion rechargeable battery 3200mAh. |
| Lamp Lifespan | 5 years, over 1.6 million measurements |
| Charging Time | 8 hours: 100% charge |
| PC Software | CQCS3 Software |
| Printer (Optional) | Mini thermal printer |
Frequently Asked Questions
What are the first steps for setting up the YR05512 colorimeter?
The initial steps include unpacking the device, ensuring you have all components, placing it on a stable surface, and connecting it to the power supply.
How do I calibrate the YR05512 before the first use?
Calibration involves turning on the colorimeter, waiting for a warm-up period, selecting the calibration option, and using the provided standards to set the baseline measurements.
What common mistakes should be avoided during installation?
Common mistakes include not allowing the unit to warm up before calibration, placing it in direct sunlight, and neglecting periodic recalibration after extensive use.
How can I connect the YR05512 to my computer?
Connect the unit to a PC using the USB data cable provided and install the CQCS3 software to establish a connection for data exporting and integration.
What is the expected lifespan of the YR05512 lamp?
The lamp in the YR05512 has a lifespan of approximately 5 years or over 1.6 million measurements before it requires replacement.
Can I use the YR05512 in different sectors?
Yes, the YR05512 is versatile and can be applied in various sectors, including industrial, clinical, educational, and food industries, with tailored protocols for each application.
Where can I request a quote for the YR05512?
You can easily request a quote for the YR05512 by reaching out through our dedicated channels.
If you are looking for a fusion of innovation and quality, you have come to the right place. At Kalstein, we offer you the luxury of exploring our exclusive catalog of laboratory equipment. We manufacture every device to the highest standards of excellence. Our intuitive and seamless online purchasing channels are designed for your convenience, securing the most competitive prices. Hesitate no longer — we bring science to life, it is time to become part of our community.