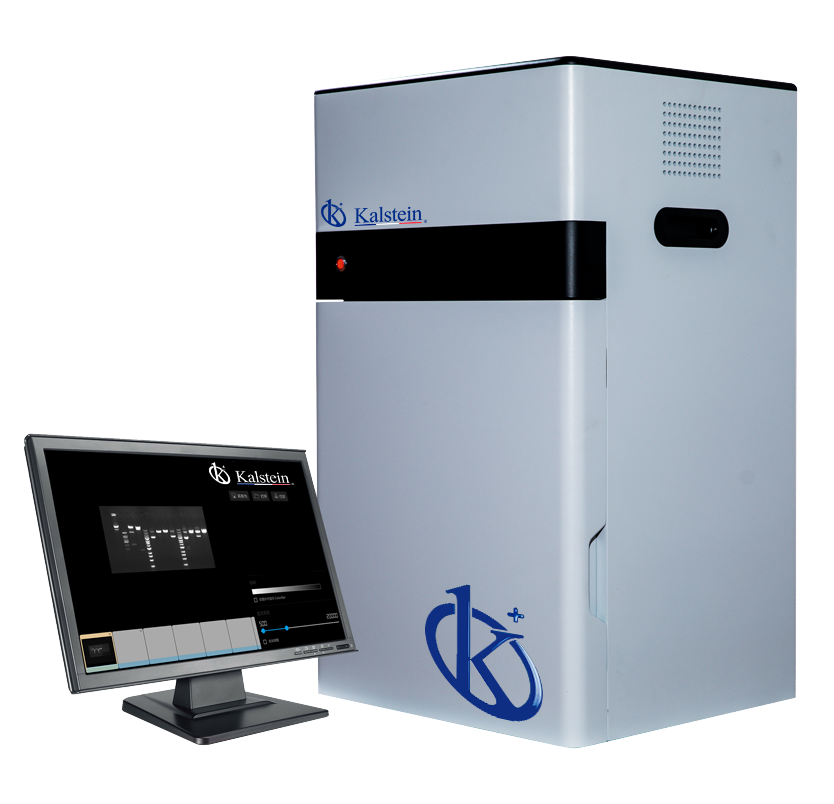
Installation and Commissioning Guide for the YR06064 Gel Documentation System
The YR06064 Gel Documentation System is a state-of-the-art scientific camera designed for high-resolution imaging. This guide provides a comprehensive overview of its installation and commissioning process. Following this guide will ensure that you maximize the capabilities of the YR06064 while minimizing potential errors during setup.
Unboxing and Initial Setup
Upon receiving the YR06064, it is crucial to ensure all components are included and undamaged. The unboxing checklist includes:
- YR06064 Gel Documentation System
- Power adapter and cable
- USB connection cable
- User manual
- Software installation disc
Before proceeding, inspect for any physical damage. If any issues are found, contact customer service immediately.
Equipment Anchoring and Leveling
To achieve accurate imaging, proper anchoring and leveling of the YR06064 is essential. Here are the steps:
- Place the YR06064 on a stable, flat surface.
- Use a spirit level to ensure the camera is perfectly level.
- If necessary, adjust the legs of the stand to level the unit.
Ensure there is adequate clearance around the unit for ventilation and access to ports.
Power-Up Sequence
Follow these steps to power up the YR06064:
- Connect the power adapter to the unit and plug it into an electrical outlet.
- Turn on the main power switch located at the back of the unit.
- Wait for the system to perform self-diagnostics, which will take approximately 30 seconds.
Once the system is powered up, the LED indicator will illuminate, signaling readiness for operation.
First-Run Calibration
Conducting a calibration on your first run is crucial for obtaining accurate results. Follow these procedures:
- Open the software on your connected computer.
- Follow the on-screen prompts to initiate the calibration process.
- Utilize the standard calibration gel provided with the YR06064.
- Complete all calibration steps as instructed by the software.
Ensure to save all calibration settings to maintain consistent performance.
Network and USB Setup
The YR06064 can be connected via USB to a computer or configured to work on a network. Here’s how to set it up:
USB Connection
For a straightforward USB connection, follow these steps:
- Connect the USB cable from the YR06064 to your computer.
- Install the software if not already completed.
- Follow the prompts to configure the camera settings within the software interface.
Network Configuration
For network setup, ensure your network is stable and follow these instructions:
- Connect the YR06064 to the network using an Ethernet cable.
- Access the network settings via the software interface.
- Input your network credentials as required.
Validation of First Measurement
Once the system is fully set up, a validation measurement is necessary:
- Prepare a gel sample for imaging.
- Follow the software instructions to initiate the imaging process.
- Check the resulting images for clarity and accuracy.
This validation will confirm that the YR06064 is functioning optimally and ready for laboratory use.
Common Setup Mistakes and Solutions
While setting up the YR06064, operators may encounter common issues. Here’s a brief list of typical problems and their solutions:
| Symptom | Probable Cause | Solution |
|---|---|---|
| Equipment does not power on | Power cable not connected | Check power cable connections |
| No image displayed | Improper software installation | Reinstall the software, ensuring all drivers are up to date |
| Low image quality | Calibration not performed | Perform first-run calibration |
Technical Specifications of the YR06064
| Component | Specifications |
|---|---|
| Model | YR06064 |
| Camera Type | Scientific monochrome digital camera |
| Resolution | 20 Megapixels, 4800*4440 |
| A/D, Pixel Density | 16 bits |
| Gray Scales | 65536 |
| Lens | Motorized lens, no manual focus required |
| Sensitivity | ≤5pg EtBr stained DNA samples |
| UV Transmission | Wavelength 302nm, Area: 21x26cm |
| White LED Transmission | True LED transmission plate, Area 19x26cm |
| Filter | Standard gel doc filter |
| Image Acquisition Software | No dongle required, free updates, unlimited users |
| Image Analysis Software | No dongle required, free updates, unlimited users |
Frequently Asked Questions
What are the necessary environmental conditions for the YR06064?
The YR06064 operates optimally in a controlled environment with stable temperature and humidity levels. Ensure that the unit is placed away from direct sunlight and extreme temperatures.
How do I troubleshoot calibration issues with the YR06064?
If calibration fails, ensure the calibration gel is correctly placed and that all software settings are accurately configured. Try recalibrating following the manual’s guidance.
Can I connect multiple YR06064 units simultaneously?
Yes, multiple units can be connected to a network; however, it may require a more robust network setup to handle multiple devices effectively.
What kind of maintenance does the YR06064 require?
Regular checks of the optical components for cleanliness and functional calibration are necessary. Ensure that the software is updated frequently to maintain compatibility and performance.
How do I ensure the best image quality with the YR06064?
For optimal image quality, ensure that the lens is cleaned regularly, calibration is performed correctly, and appropriate samples are used during imaging.
Is there a warranty for the YR06064?
Yes, the YR06064 comes with a warranty. Details of warranty terms can be found in the user manual or by contacting customer support.
If you are looking for a fusion of innovation and quality, you have come to the right place. At Kalstein, we offer you the luxury of exploring our exclusive catalog of laboratory equipment. We manufacture every device to the highest standards of excellence. Our intuitive and seamless online purchasing channels are designed for your convenience, securing the most competitive prices. Hesitate no longer — we bring science to life, it is time to become part of our community.