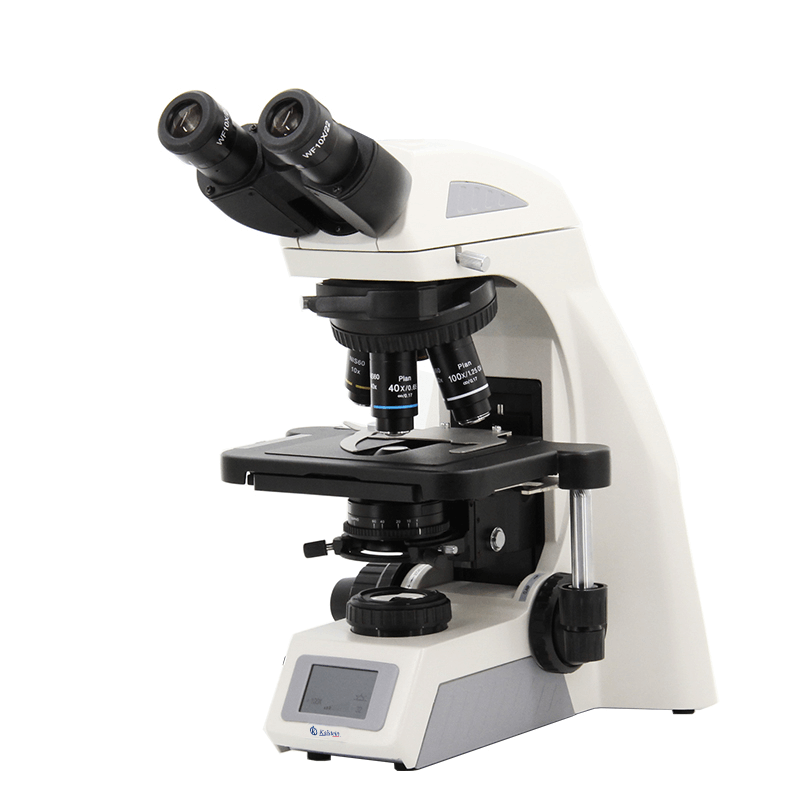
Installation and Setup Guide for the YR0267A Trinocular Microscope
The YR0267A Trinocular Microscope is a state-of-the-art optical system designed for high-resolution imaging in various applications. Proper installation and setup are crucial for achieving optimal performance and ensuring user safety. This guide provides comprehensive instructions on how to install and configure the YR0267A, covering everything from unboxing to first-run calibration.
Unboxing Checklist
Before setting up the YR0267A, it is essential to verify that all components are present. Here’s a checklist of items you should find in the box:
- YR0267A Microscope Body
- Eyepieces (10x/22 mm)
- Objectives (4x, 10x, 40x, 100x)
- Illumination Source (Kohler S-LED 3W)
- Power Supply
- Instruction Manual
- Warranty Registration Card
Positioning the Microscope
The YR0267A should be placed on a sturdy, level surface, away from direct sunlight and vibrations that may affect its performance. Here are the steps to position the microscope:
- Choose a clean, well-lit area with sufficient space for operation.
- Ensure the surface is stable and can support the weight of the microscope (approximately 12.1 kg).
- Adjust the height of the table or use a microscope stand to achieve a comfortable working position.
Power-Up Sequence
Once the microscope is positioned correctly, follow these steps to power it up:
- Connect the power supply to the microscope.
- Plug the power supply into an appropriate wall outlet (100-240 V, 50/60 Hz).
- Switch on the microscope using the main power switch located on the base.
First-Run Calibration
After powering up, it’s crucial to calibrate the microscope for optimal performance:
- Adjust the interpupillary distance to suit your eyesight (47-78 mm).
- Using the coarse focus knob, bring the objective lens into focus with a slide.
- Utilize the fine focus knob for precise focusing.
- Adjust the brightness settings based on the objective lens in use, ensuring clarity without strain on the eyes.
Common Setup Mistakes
To avoid common pitfalls during the installation and setup of the YR0267A, be aware of the following mistakes:
- Not leveling the microscope properly can lead to inaccurate readings.
- Forgetting to adjust the brightness according to the objective lens may cause visual discomfort.
- Over-tightening the stage clamps can damage the equipment.
Technical Specifications of YR0267A
| Model | Catalog No. | Optical System | Observation Method | Weight |
|---|---|---|---|---|
| YR0267A | YR0267A (current) | NIS Infinity Optical System | Bright Field | 12.1 kg |
Frequently Asked Questions
How do I ensure my YR0267A microscope is properly calibrated?
Proper calibration involves adjusting the interpupillary distance, focusing with both coarse and fine knobs, and setting the brightness based on the objective lens. It is crucial to follow the calibration steps outlined in the manual for optimal performance.
What should I do if the YR0267A does not power on?
If the microscope does not power on, check the power supply connection, ensure the outlet is functional, and verify that the main power switch is turned on. If the problem persists, consult the troubleshooting section of the manual.
Can I use different objectives with the YR0267A?
Yes, the YR0267A is compatible with various objectives that are designed for its optical system. Always ensure that they are correctly mounted and calibrated according to the manufacturer's guidelines.
How do I change the illumination settings on the YR0267A?
The illumination settings can be adjusted using the brightness control knob located on the microscope. Ensure that the setting corresponds to the objective being used for optimal clarity.
What maintenance is required for the YR0267A microscope?
Regular maintenance includes cleaning the lenses with appropriate lens paper, checking the alignment of the optical system, and ensuring the mechanical stage is functioning smoothly. It is recommended to perform these checks before and after use.
Are there any recommended accessories for the YR0267A microscope?
Yes, optional accessories include additional objectives, filters, and camera adapters that can enhance the functionality of the YR0267A for specific applications such as fluorescence microscopy.
Where can I request a quote for the YR0267A microscope?
You can request a quote for the YR0267A microscope through our online channels or by contacting our sales team directly for personalized assistance.
If you are looking for a fusion of innovation and quality, you have come to the right place. At Kalstein, we offer you the luxury of exploring our exclusive catalog of laboratory equipment. We manufacture every device to the highest standards of excellence. Our intuitive and seamless online purchasing channels are designed for your convenience, securing the most competitive prices. Hesitate no longer — we bring science to life, it is time to become part of our community.